
Editing your app
Every way to change a generated app in the MeDo editor: chat, Edit mode, the Screenshot tool, the Files and Code views, and versions.
Once MeDo has built your app, all changes happen in the editor. The preview on the left updates as you work; visitors only see a change after you publish it (the Publish button becomes Update once the app is live). Nothing you do here touches the live app until then.
Pick the right tool
Chat: describe the change
Type what you want into the box at the bottom right, the same way you would brief a colleague. MeDo works through the change, shows a task counter while it does, and adds a new version card when it finishes.
- Name the place. "On the Menu section, show prices in bold" lands better than "make prices stand out".
- One change per message. A single clear request usually comes out right; six at once often come out half done.
- Answer follow-up questions when MeDo asks one, rather than re-sending the original message.
- Use the suggestion chips under the last reply ("Add pre-order", "Add customer reviews") when they match what you had in mind — they are written for your app.
The mode selector next to the + button controls how much thinking goes into each message: Fast Build (10 credits per completed message) for small edits, Deep Build (40) for features that touch several pages or the backend. See Using build modes.
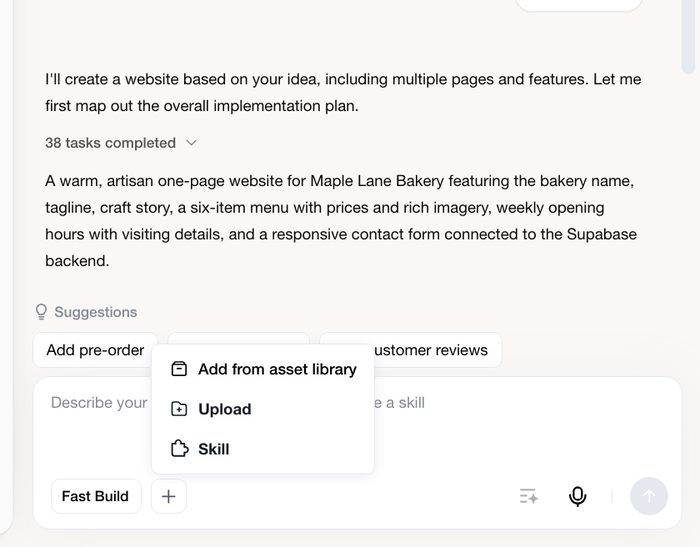
The + button attaches things to your message:
- Add from asset library — pick a logo, photo, or document you have already uploaded to the Asset library.
- Upload — add files from your computer (up to 5 files, 20 MB each). Reference images work especially well: "make the hero look like this".
- Skill — call a Skill such as image or video generation inside the request. You can also type
@in the box. See Using Skills.
Edit mode: click an element and change it
Edit mode is for the kind of change you can see: a headline that should read differently, a button that should be darker, a section that needs more breathing room. It does not use a conversation turn.
- Click Edit in the toolbar above the preview. Undo and redo buttons appear next to it.
- Click any element in the preview. MeDo outlines it, shows its tag (H1, P, BUTTON, IMG…), and opens the Edit element panel on the right.
- Change what you need and click elsewhere. The preview updates immediately.
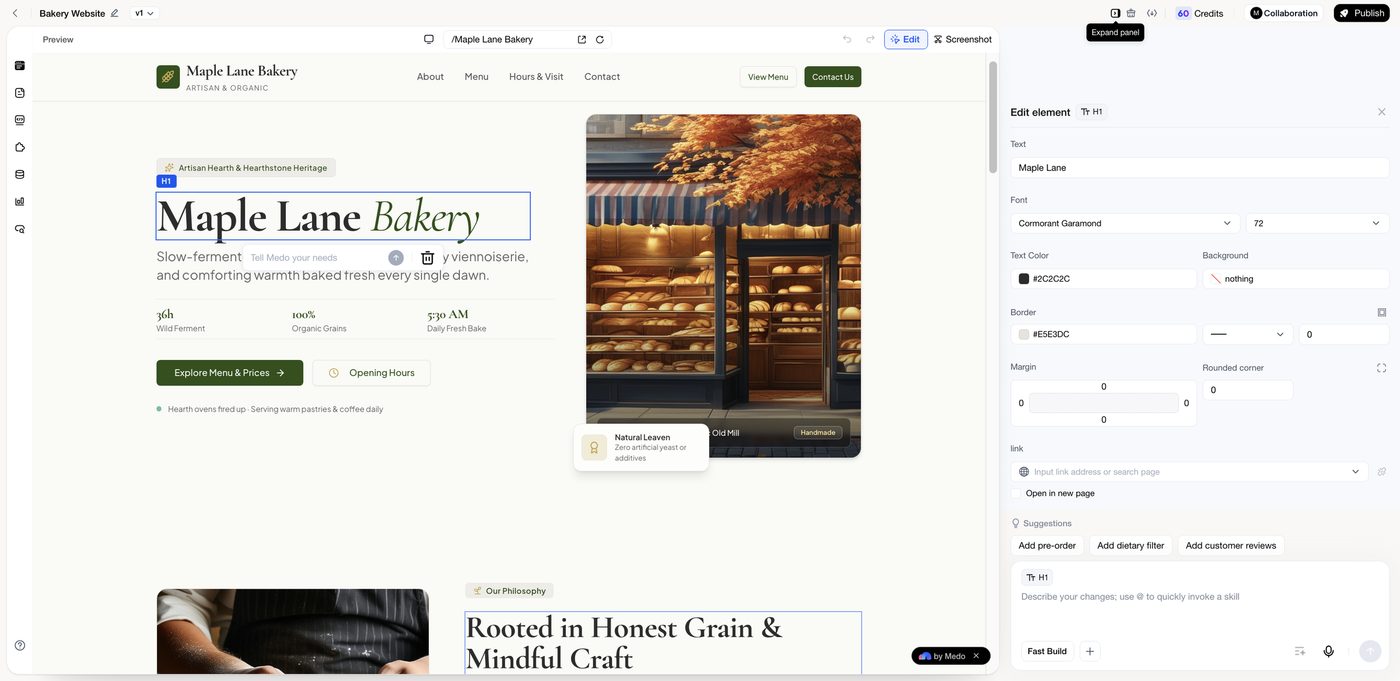
The Edit element panel covers:
Two shortcuts sit under the selected element:
- Tell Medo your needs — type an instruction about just this element ("rewrite this in a friendlier tone", "swap this photo for a close-up of croissants"). The element stays attached to your message as a chip, so MeDo knows exactly which one you mean.
- Delete — remove the element.
Click Edit again to leave Edit mode. Edits stay in your draft until you publish.
Screenshot: mark the spot
When the thing you want to change is easier to point at than to name, use the Screenshot button in the preview toolbar. It captures the preview, gives you a small drawing toolbar (rectangle, arrow, text, pen, colour, undo), and sends the marked image to chat with Add to chat. Then describe the change in a sentence.
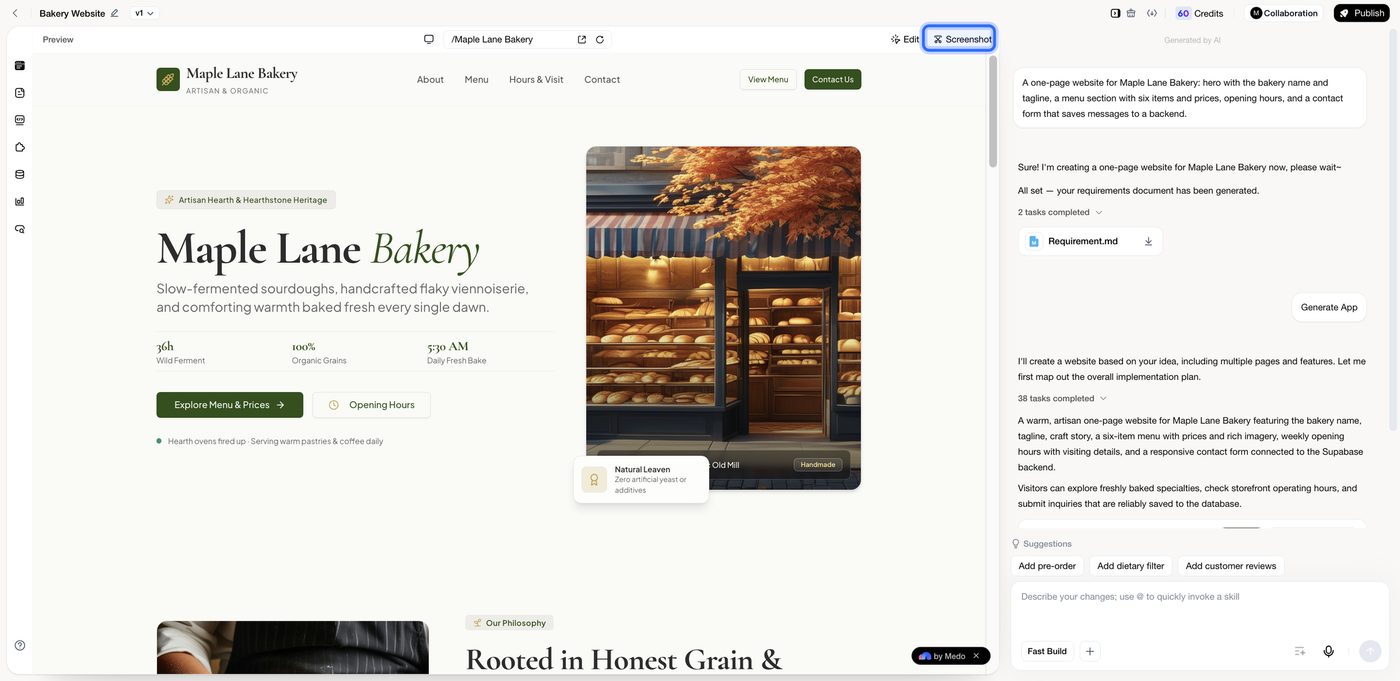
Worked examples are in Edit with Screenshots.
Files and Code views
The icons on the far left switch what the main panel shows.
- Files lists everything the project holds outside the source code: the requirements document MeDo generated (
Requirement.md) and anything you uploaded. - Code opens the project's file tree and a source editor. Use it to read how something is implemented or to make a precise change the visual tools do not expose. The preview updates when you save.
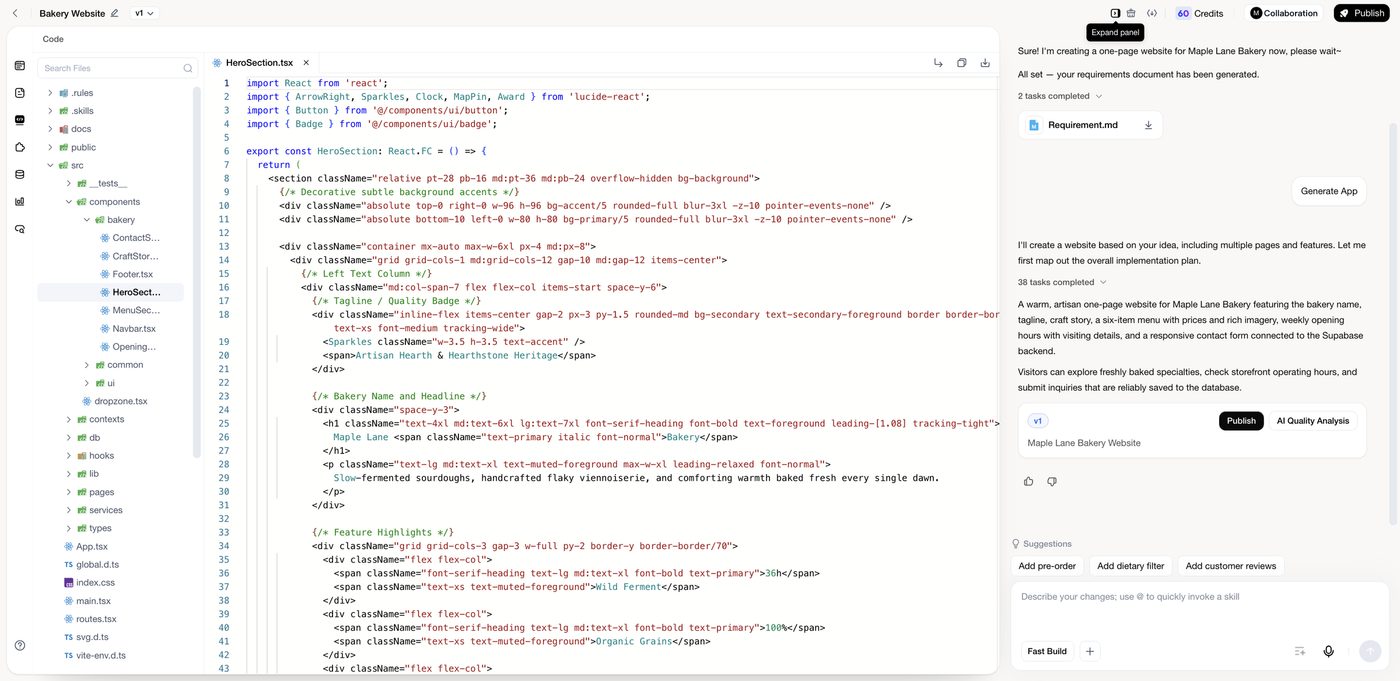
If you edit the source by hand, publish afterwards so the live app and any downloaded code match your latest state. The rest of the views — Skill, Backend, data analysis, SEO — are covered in Interface Tour.
Rename the app
Click the pencil next to the app name at the top left of the editor. The name is what appears in your project list and in the browser tab of the published app.
Versions
Every completed build is saved as a version, and each one gets a card in the conversation. Click the v1-style button in the top bar to open Historical Versions, where you can see every version with its author and time, search by name, or click Create Version to snapshot the current draft before a risky change.
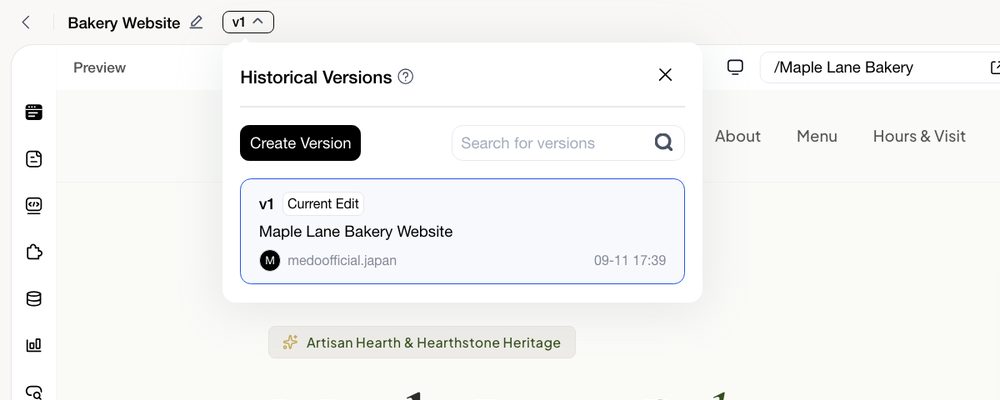
Restoring an earlier version and publishing it is covered in Version rollback & trash.
Clear context
MeDo remembers the recent conversation when it interprets a new request. If you are switching to an unrelated topic and want a clean slate, click the Clear context icon in the top bar. Your app and its versions are not affected.
Publish your edits
When the draft looks right in the preview, click Update (top right) and confirm. Until then, the live app keeps serving the previous version. Details are in Updating & taking offline.
Go deeper
- Edit in Depth — choosing between chat, Edit mode, screenshots, and code for tricky changes.
- Edit with Screenshots — worked examples.
- Previewing your app — checking desktop and mobile before you publish.