
App data & forms
Where the data your app collects lives, how to browse and edit it in the Table editor, import records from CSV, and manage the people who signed up.
Everything your app stores — bookings, enquiries, orders, menu items, sign-ups — lives in tables in your app's backend. There are two ways to look at it:
- The Table editor in the MeDo editor. Every table and every row, with filtering, inserting, and CSV import. This is the complete view and it always exists.
- An admin page inside your app. If you asked for one ("staff should be able to see and update orders"), MeDo generates it as part of the app, with its own sign-in. This is the friendlier view for day-to-day use.
Browse and edit data in the Table editor
- Open the app in the editor and click the Backend icon in the left rail.
- Switch to the environment tab (labelled Single environment unless you have set up separate environments) and choose Data table management.
- Pick a table on the left — for example
contact_messagesormenu_items. Rows appear in the grid once the table has records; a new table shows This form is empty with Import data from CSV.
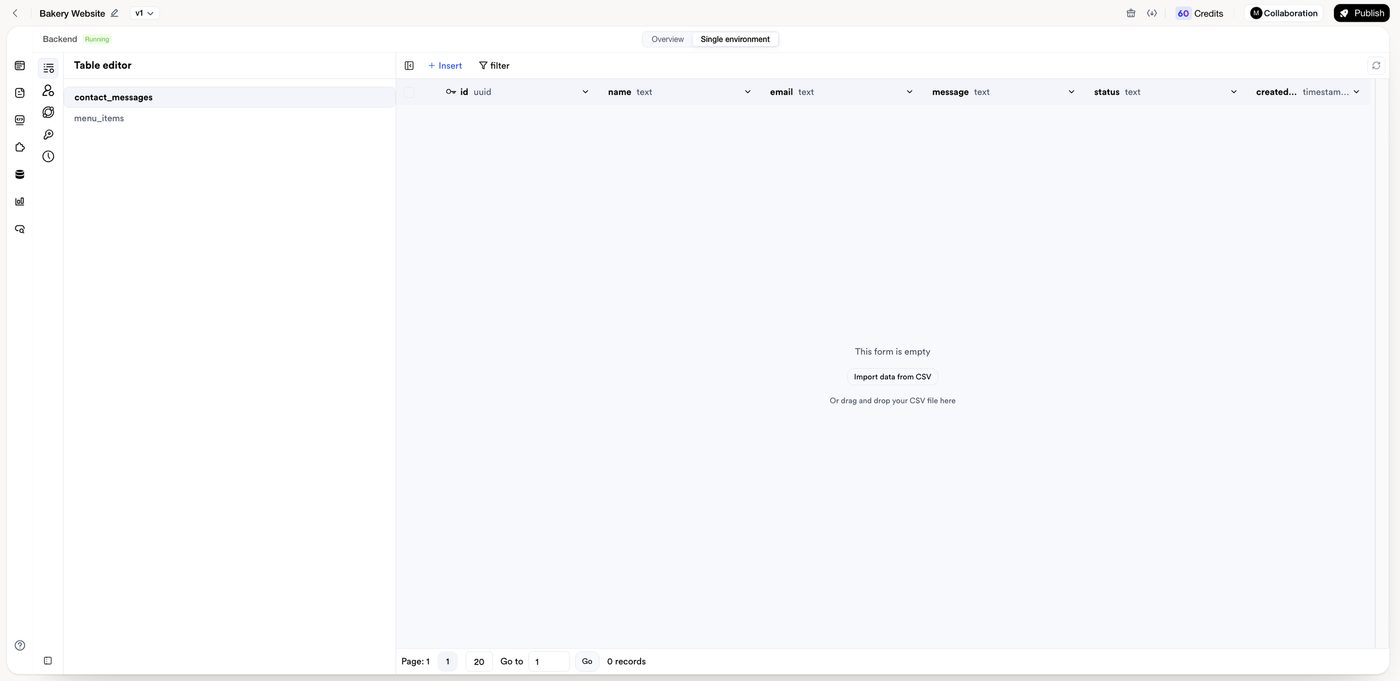
From here you can:
- Filter rows to find a record;
- Insert a row by hand, for example a new menu item;
- edit a cell in place, or delete a row;
- Import data from CSV to load an existing list — products, members, locations — in one go. Match the CSV column names to the table's columns first.
Changes made here take effect immediately in the app, so treat live customer data with care.
Manage the people who signed up
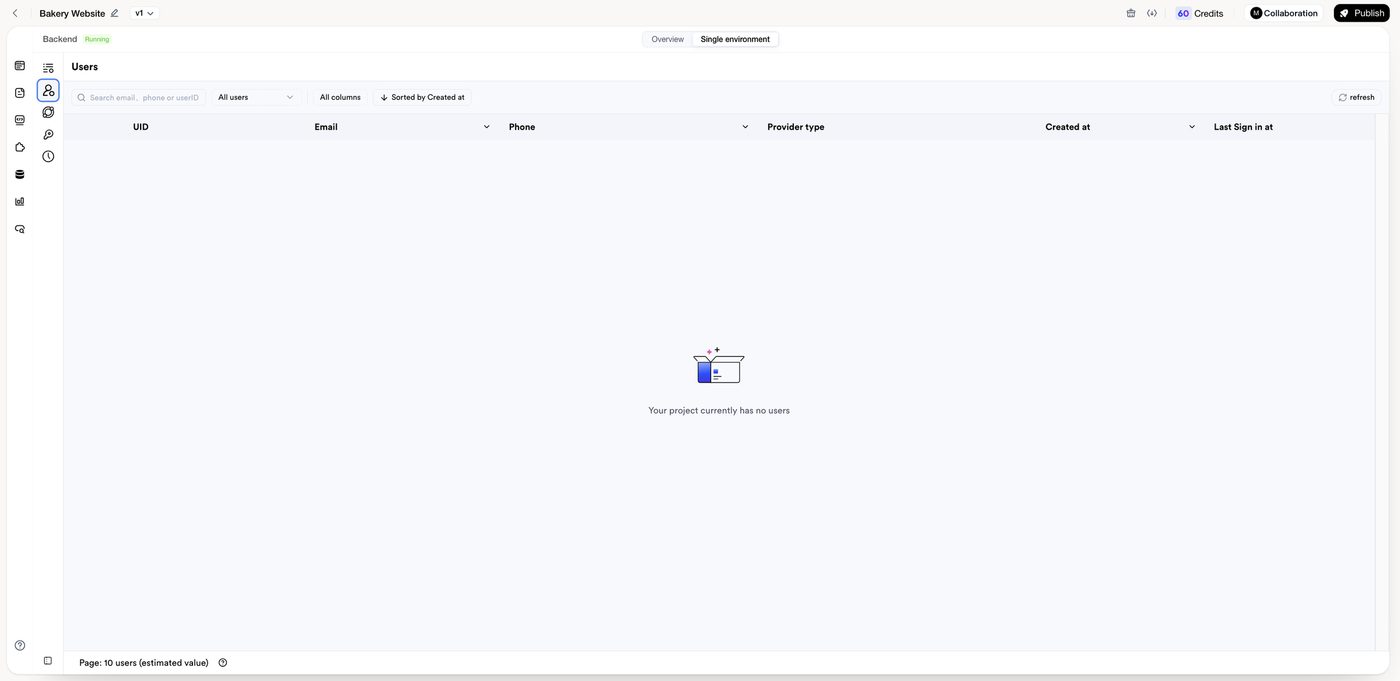
User management in the same panel lists everyone who has created an account in your app: user ID, email, phone, sign-in provider, when they signed up, and when they last signed in. Search by email, phone, or ID to find a specific account. A project with no accounts yet shows Your project currently has no users; the same columns fill in once people sign up. Roles and what each user is allowed to see are covered in Managing sign-in & users.
Use the app's own admin page
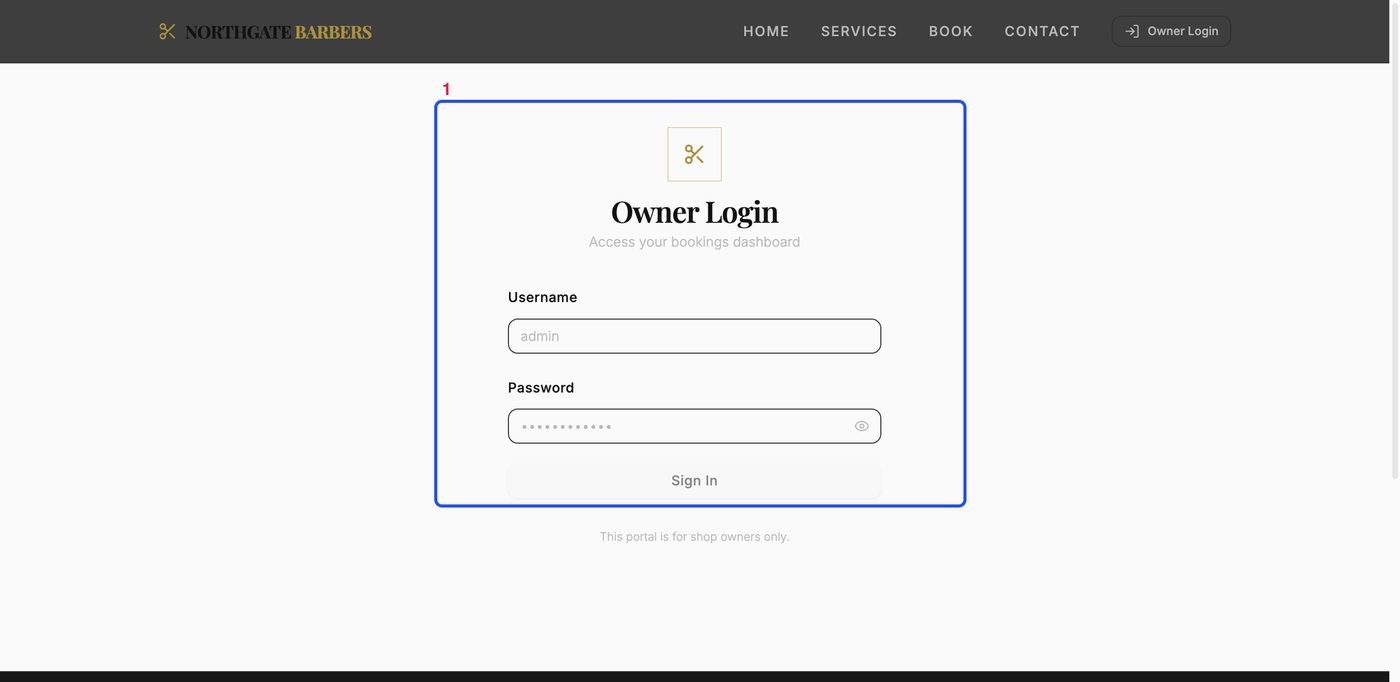
If your app has an admin area, MeDo posts its login details in the conversation when it builds the app — save them. To reach it:
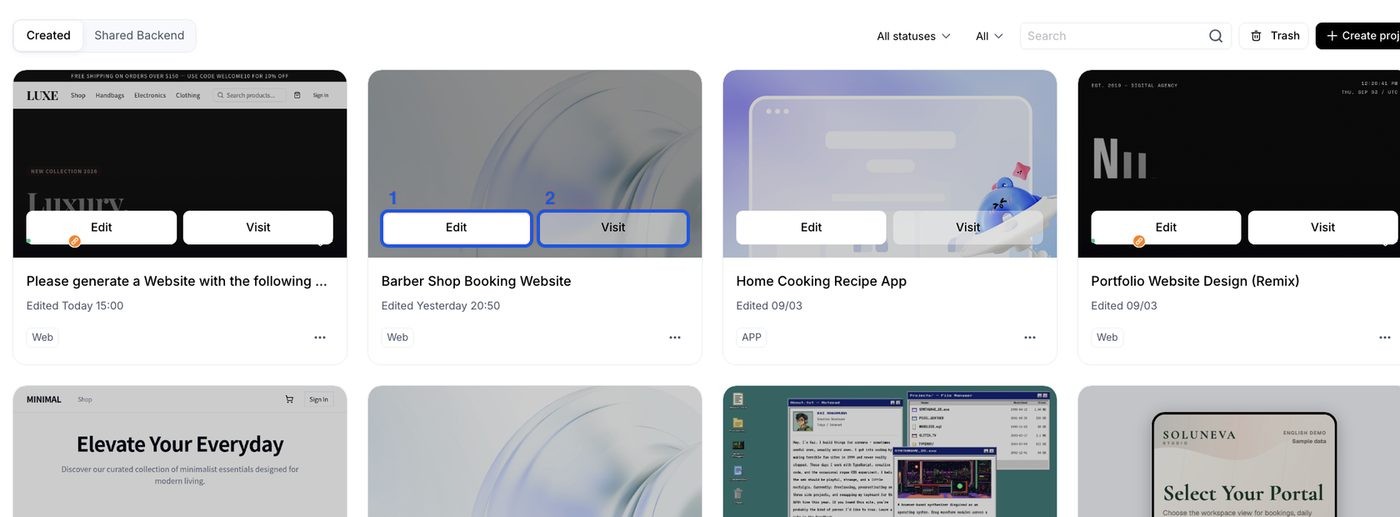
- Open Project in the sidebar and hover the app card. Edit opens the draft in the editor; Visit opens the published app.
- In the app, click the admin entry in its navigation (often Admin or Owner Login) and sign in.
What the admin page can do depends on what you asked for. Typical requests: list and filter submissions, change an order's status, export records, show counts for today. Ask in the conversation to add anything missing.
Draft data and live data
By default an app has a single backend environment, so the draft you see in the preview and the published app read and write the same tables. A test booking you make in the preview will show up in the live admin page. Either delete test rows in the Table editor before launch, or — on Pro or Max — set up separate development and production environments. See Backend settings & keep-alive.
Change the data model
Adding a field, a new table, or a relationship is a chat request, not a manual edit: "Add a notes field to bookings and show it on the admin page." MeDo updates the table, the form, and the pages together. Use Deep Build for changes that touch several pages.
Related
- Edge Functions — server-side logic and scheduled tasks.
- Sharing a backend — let several apps read and write the same data.
- Managing access & roles — decide who can see which records.
- App Analytics — visits and dwell time for the published app.