
Custom domains & SSL
Put your published app on a domain you own, step by step, with no technical background needed — plus the cheaper option of a custom prefix on the default address.
Every published app gets an address like https://app-ebe7aou354ap.appmedo.com. It works, but it is hard to remember and it is not your brand. This page shows how to make your app open at your own address instead — www.yourbakery.com — without needing to know how the internet plumbing works.
First, the two words you need
- Domain — the name people type, like
yourbakery.com. You buy it (usually a few dollars a year) from a domain provider such as GoDaddy, Namecheap, Cloudflare, Squarespace, Hostinger, or IONOS. - DNS records — a short list, kept by your domain provider, that says where each name should point. To connect a domain to MeDo, you add one or two lines to this list. MeDo tells you exactly what to add, and for most providers it can even add them for you.
That is all. HTTPS (the padlock in the browser) is handled by MeDo automatically once the domain is connected — you never buy or install a certificate.
Before you start
- A Pro or Max plan. Connecting a custom domain is a subscription feature. See Subscription & Billing.
- A published app. Publish first, then attach the domain. See Publishing a release.
- A domain you own, and the email and password for the account at the provider you bought it from. If someone else manages the domain for you (an agency, your IT person), you do not need their password — see step 5.
- You can connect up to 2 domains to one app.
Connect your domain, step by step
1. Open the domain dialog
In the editor, click Update at the top right to open the publish panel, then click Configure Custom Domain.
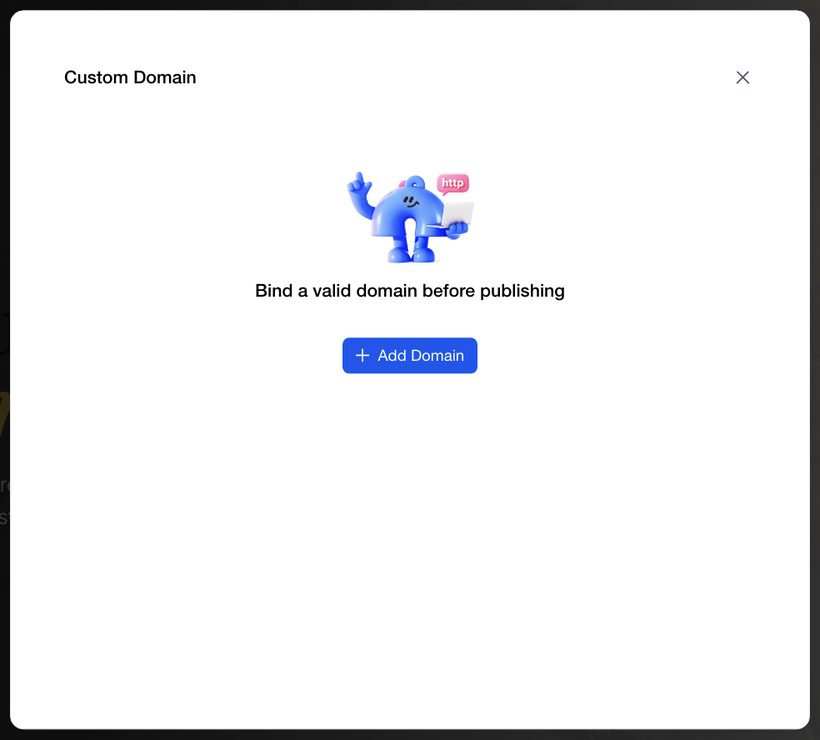
Click + Add Domain.
2. Type your domain
MeDo uses a service called Entri to walk you through the connection. Type your domain exactly as you want people to use it, then click Continue.
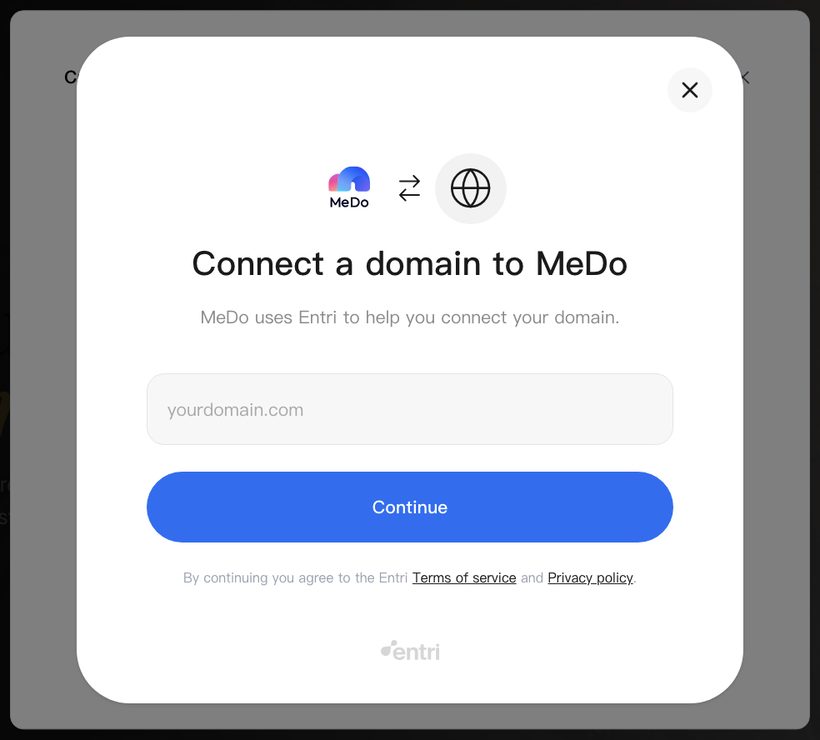
yourbakery.com— the bare name (also called the root domain).www.yourbakery.com— withwwwin front. Pick whichever you will print on your business cards; you can add the other one as your second domain later.
3. Pick your domain provider
Entri asks where you bought the domain. Click the logo, or search for the name. If you are not sure, look for the confirmation email from when you bought it — the sender is your provider.
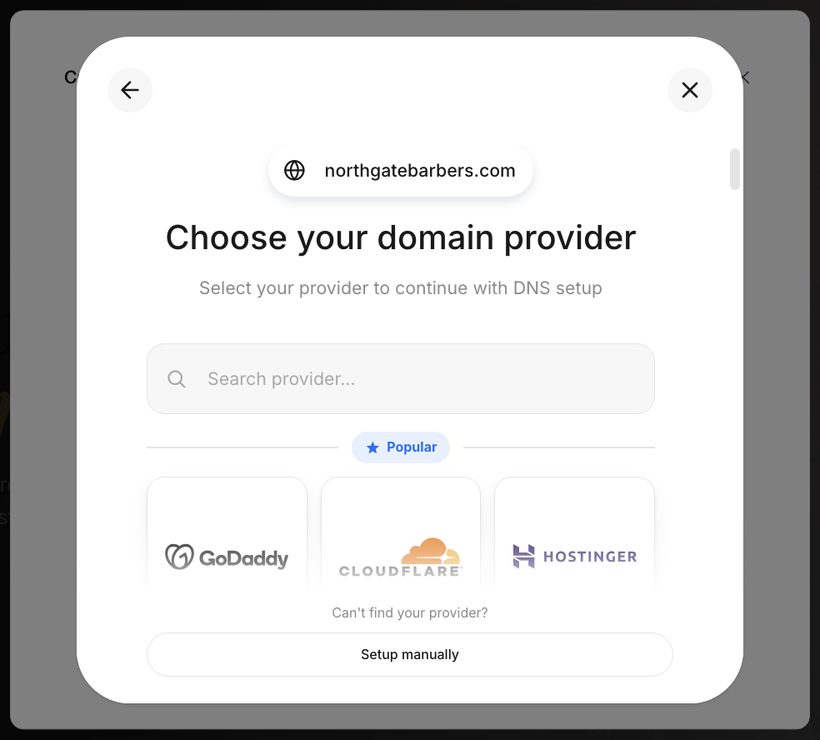
4. Let Entri do the work (the easy path)
For most providers you will see a Continue with [provider] button.
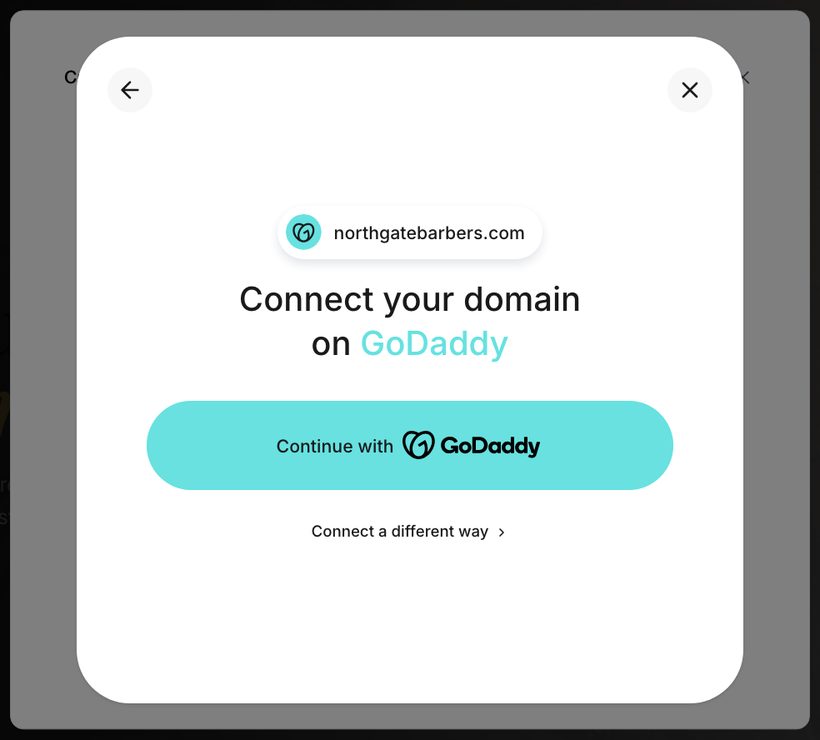
Click it, sign in to your provider account when Entri asks, and approve the change. Entri adds only the DNS records MeDo needs and brings you back to MeDo.
5. If you cannot sign in, choose another way
Click Connect a different way to see the alternatives:
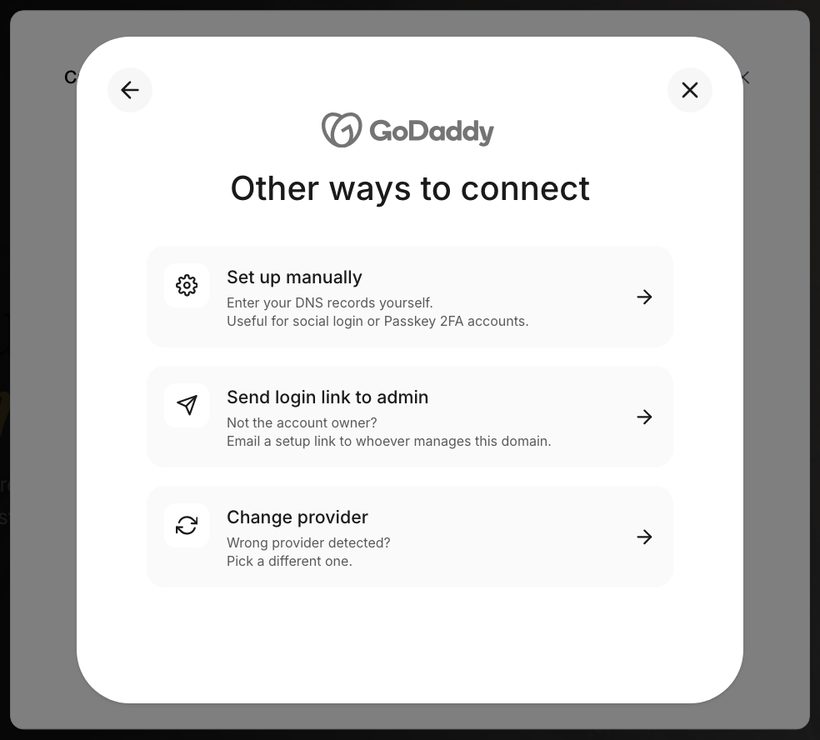
- Send login link to admin — the easiest option if someone else manages your domain. Enter their email; they receive a link that lets them approve the connection from their own account. You never need their password.
- Set up manually — you add the records yourself. Entri shows you exactly what to copy (next step). Choose this if your provider is not listed or your account uses a sign-in method Entri cannot use.
- Change provider — go back if the wrong provider was detected.
6. Add the records yourself (manual path)
If you chose Set up manually, you see a card like this:
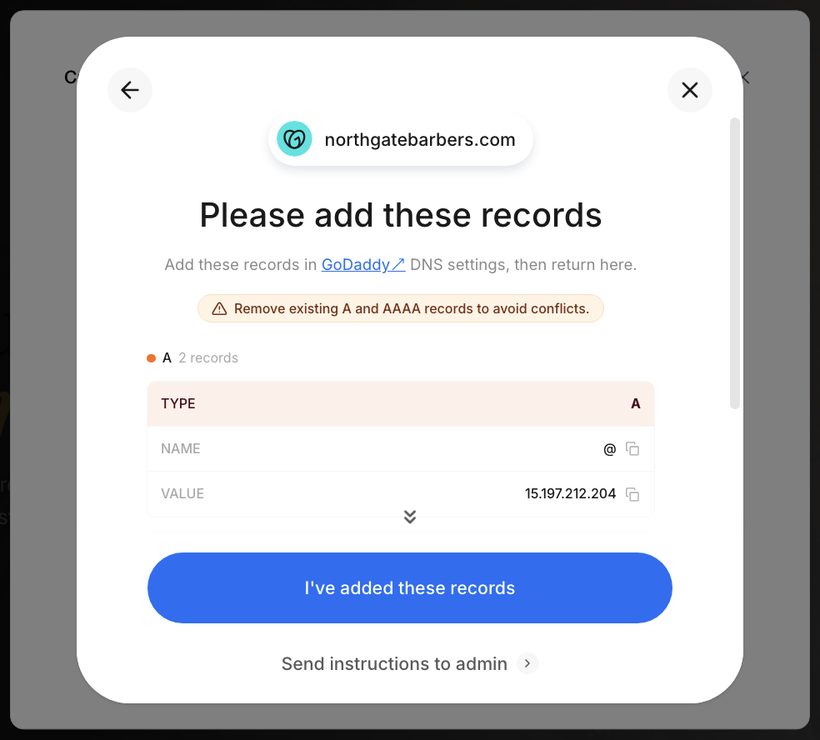
Keep this window open and, in a second browser tab:
- Sign in to your domain provider and find the page called DNS, DNS settings, DNS records, or Manage DNS. It is usually under your domain's name in the account dashboard.
- Click Add record (the wording varies).
- For each record MeDo lists, copy the three fields across exactly, using the copy buttons: Type (for example
AorCNAME), Name (the@symbol means the bare domain;wwwmeans the www version), and Value. Leave any TTL field at its default. - If MeDo says to remove existing A and AAAA records, delete the old records of that type for the same name first — otherwise the old and new addresses fight and the domain will not connect.
- Save, then come back to MeDo and click I've added these records.
If you get stuck on your provider's page, click Send instructions to admin to email the exact records to whoever can help.
7. Wait for the connection
DNS changes take time to spread across the internet — usually a few minutes, occasionally up to a day. When MeDo confirms the domain, it issues the HTTPS certificate automatically and your app answers on your own address.
Use a custom prefix instead (no domain needed)
If you do not own a domain, you can still replace the random part of the default address with a word you choose, giving you https://yourbakery.appmedo.com.
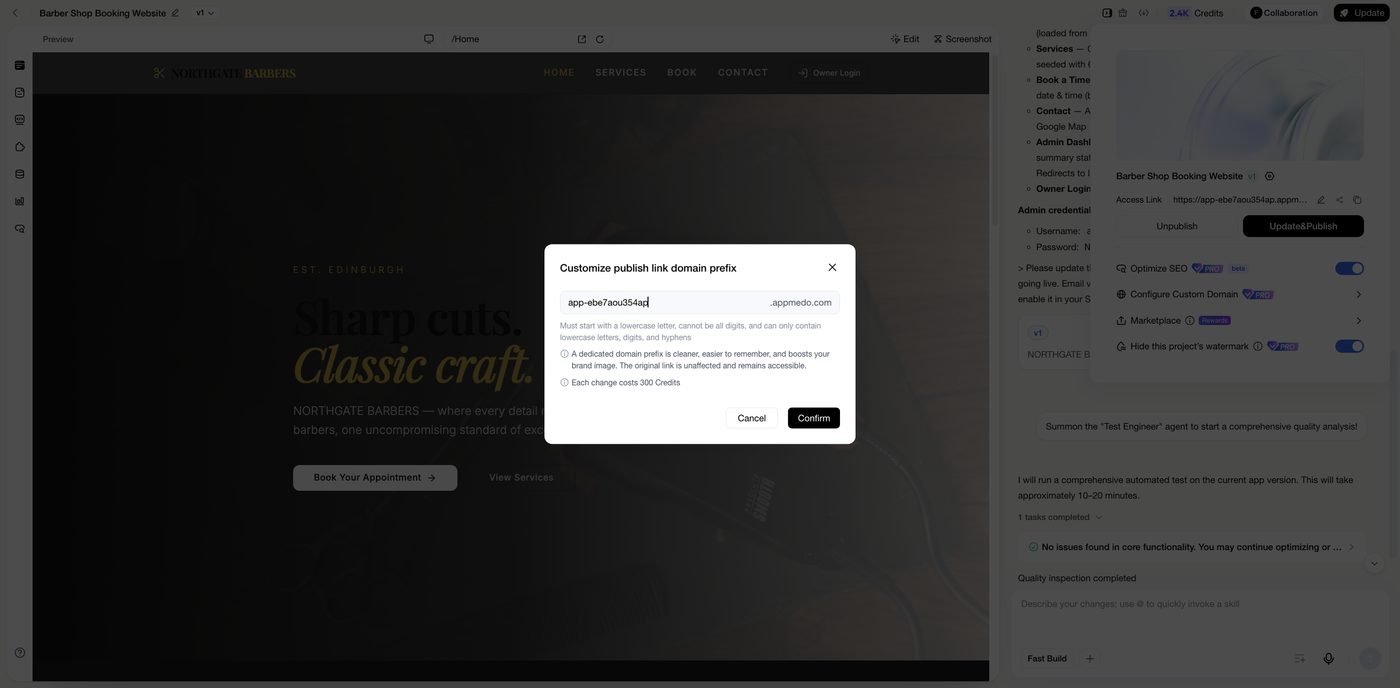
- Open the publish panel (Update) and click the pencil next to Access Link.
- Type your prefix. It must start with a lowercase letter, cannot be all digits, and may only contain lowercase letters, digits, and hyphens.
- Click Confirm. Each change costs 300 credits; the original link keeps working alongside the new one.
Compared with a real domain, a prefix needs no DNS and takes seconds, but visitors still see appmedo.com in the address.
After connecting
- Your app opens on your domain with the padlock (HTTPS). The original MeDo link keeps working too.
- Update links you have already shared, and if the app is listed in the Marketplace, check the listing.
- If you move the project to the trash, the domain is released. Restore the project and connect it again if you change your mind.