
Exporting & self-hosting
Take your app off the platform: download the source, run it locally, and move the backend to your own Supabase project.
Your app is not locked to MeDo. You can download its full source and run it on your own infrastructure.
When you would do this
- You need to host on your own servers, for compliance or company policy.
- A developer is taking the project over and wants it in their own repository.
- You want to keep building beyond what the platform generates for you.
- You are handing the project to a client who wants to own everything.
If none of those apply, staying on MeDo is simpler: hosting, backend, and updates are handled for you.
What it costs and what it takes
Each download costs 300 credits. Beyond that, self-hosting means you take over the parts MeDo was doing: provisioning a database, deploying functions, managing keys, and hosting the frontend. Budget an hour for a first migration and expect to need a terminal.
Note: If your app is pure frontend with no stored data, you only need sections 1 to 4, then run it locally in section 9. If your app stores data, follow the whole flow to rebuild the structure on your own Supabase project.
1. What Is and Isn't in Your Download
The ZIP you get from Download Code contains the structure and function code for the backend — no data, no files, no keys. This determines what the migration involves.
Note: The URL and anon key in
.envpoint to MeDo's hosted backend. If you don't replace them, your local app still talks to the platform, not your own database. The core of migration is "rebuild the structure, then swap these two values".
2. Download the Application Code
- Open the app in the editor. Downloading is a Pro and Max feature and needs a finished build — wait until generation completes.
- Click the Download Code icon in the top bar (to the left of your credit balance). A popover explains that the package includes a
README.mdfor further development. - Click Download Code to confirm. The download costs 300 credits.
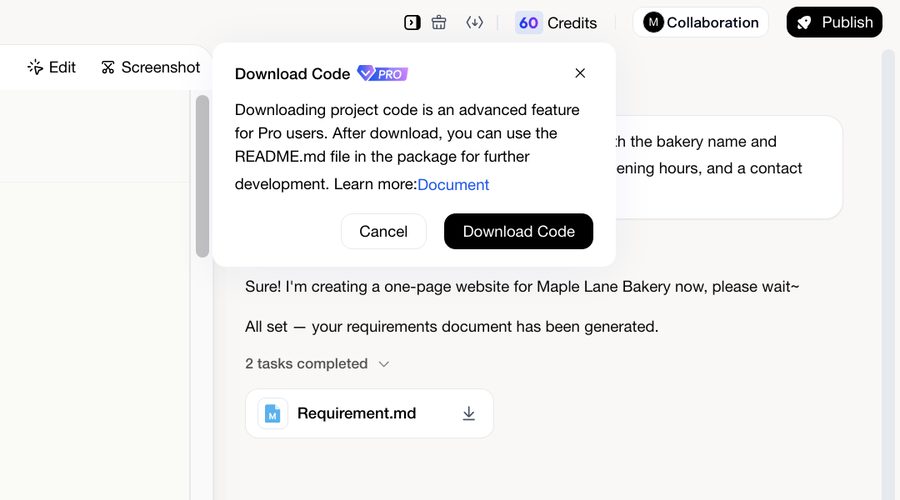
You get the version you are currently editing. If you changed fonts, colours, or content in Edit mode or the Code view, publish first so the package contains those changes.
3. Unzip the Source
Unzip the downloaded package and enter the directory:
A typical structure looks like this:
Note: If
schema.sqlexists, use it (section 5, full import). If not, runsupabase db pushto apply the migrations.
4. Prepare Tools
You can use VSCode, IntelliJ IDEA, or any IDE you prefer to edit the code. To run and migrate the app you need three tools: Node.js 20 or later, the Supabase CLI, and psql (the Postgres client).
On macOS with Homebrew:
Note:
libpqis keg-only. Ifpsqlis still reported as "command not found", add it to your PATH withecho 'export PATH="/opt/homebrew/opt/libpq/bin:$PATH"' >> ~/.zshrc, then reopen the terminal.
On Windows, install Node.js LTS, the Supabase CLI via Scoop (scoop install supabase), and PostgreSQL (which includes psql). The commands below are identical; only the export PATH=... line is macOS-specific.
On Linux, install Node 20 or later, the Supabase CLI from the release binary, and psql via your package manager (for example sudo apt install postgresql-client).
Verify all three print a version:
Note: If your app is pure frontend with no backend, skip ahead to section 9 and run it locally now. The Supabase steps (5 to 8) only apply to apps with backend data storage.
5. Create Your Own Supabase Project
If You Don't Have a Supabase Account Yet
Go to https://supabase.com, click Start your project, and sign up with GitHub or email (free). The Free plan is plenty for migrating one MeDo app.
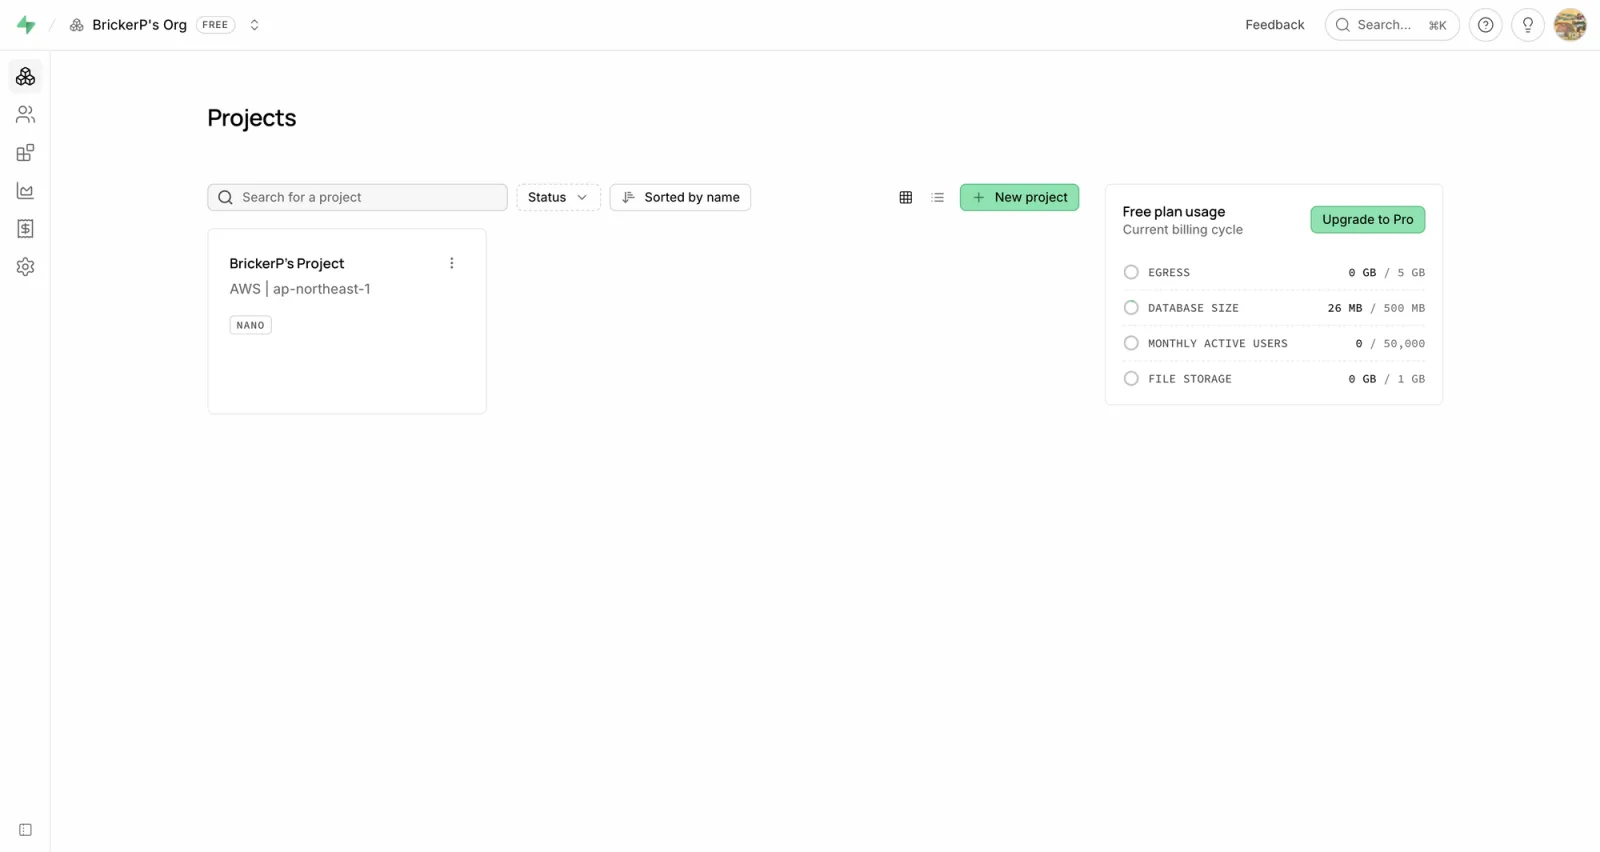
Note: The Free plan allows at most 2 active projects at once. If you already have 2, pause one first, otherwise you cannot create a new one.
Create the Project
On the organization home click New project and fill in:
- Project name, for example
taskflow-migrate - Database password: click Generate a password for a strong one, and be sure to copy and save it (needed for schema import; if lost you can only reset it)
- Region: pick the one closest to your users
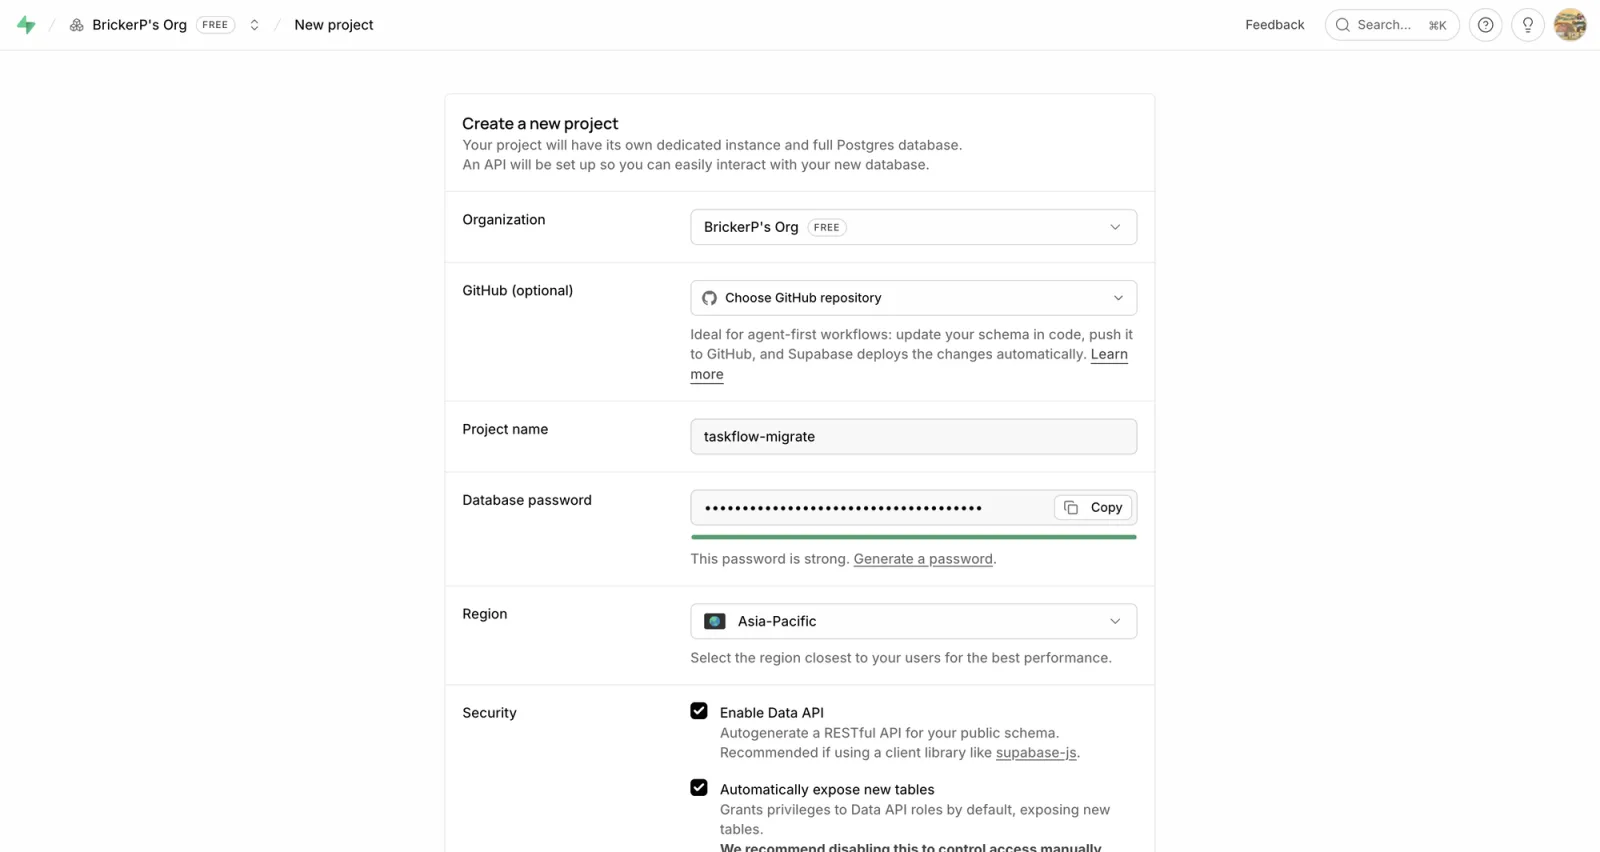
Click Create new project and wait one to two minutes for provisioning.
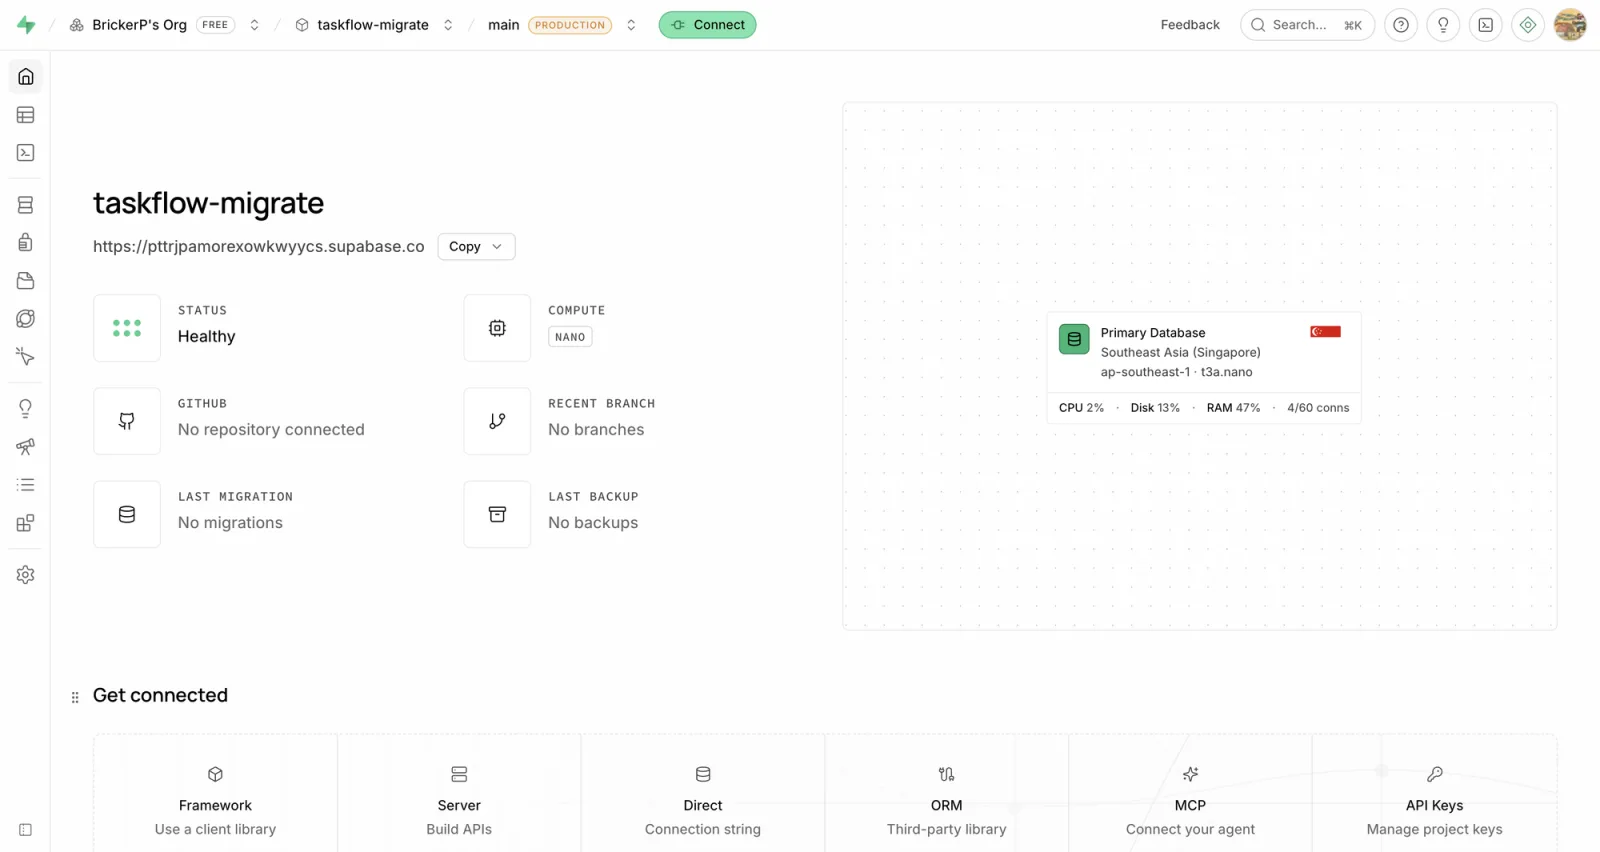
Collect Four Credentials
Go to Project Settings and record the following. You need them in every later step.
Note: The anon key is public by design (protected by RLS) and can go into the frontend
.env. The service_role / secret key is a full-access key — never put it in the frontend or commit it to git.
6. Import the Database Structure
Use the database connection string from section 5 to load schema.sql into the new database. The string looks like postgresql://postgres:<your-DB-password>@db.<project-ref>.supabase.co:5432/postgres.
Note: MeDo's
schema.sqluses defensive syntax (CREATE TABLE IF NOT EXISTS, storage policies wrapped inDO $$ ... EXECUTE, buckets withON CONFLICT DO UPDATE), so importing into a brand-new project runs without conflicts.
Without schema.sql, apply the migrations through the CLI instead:
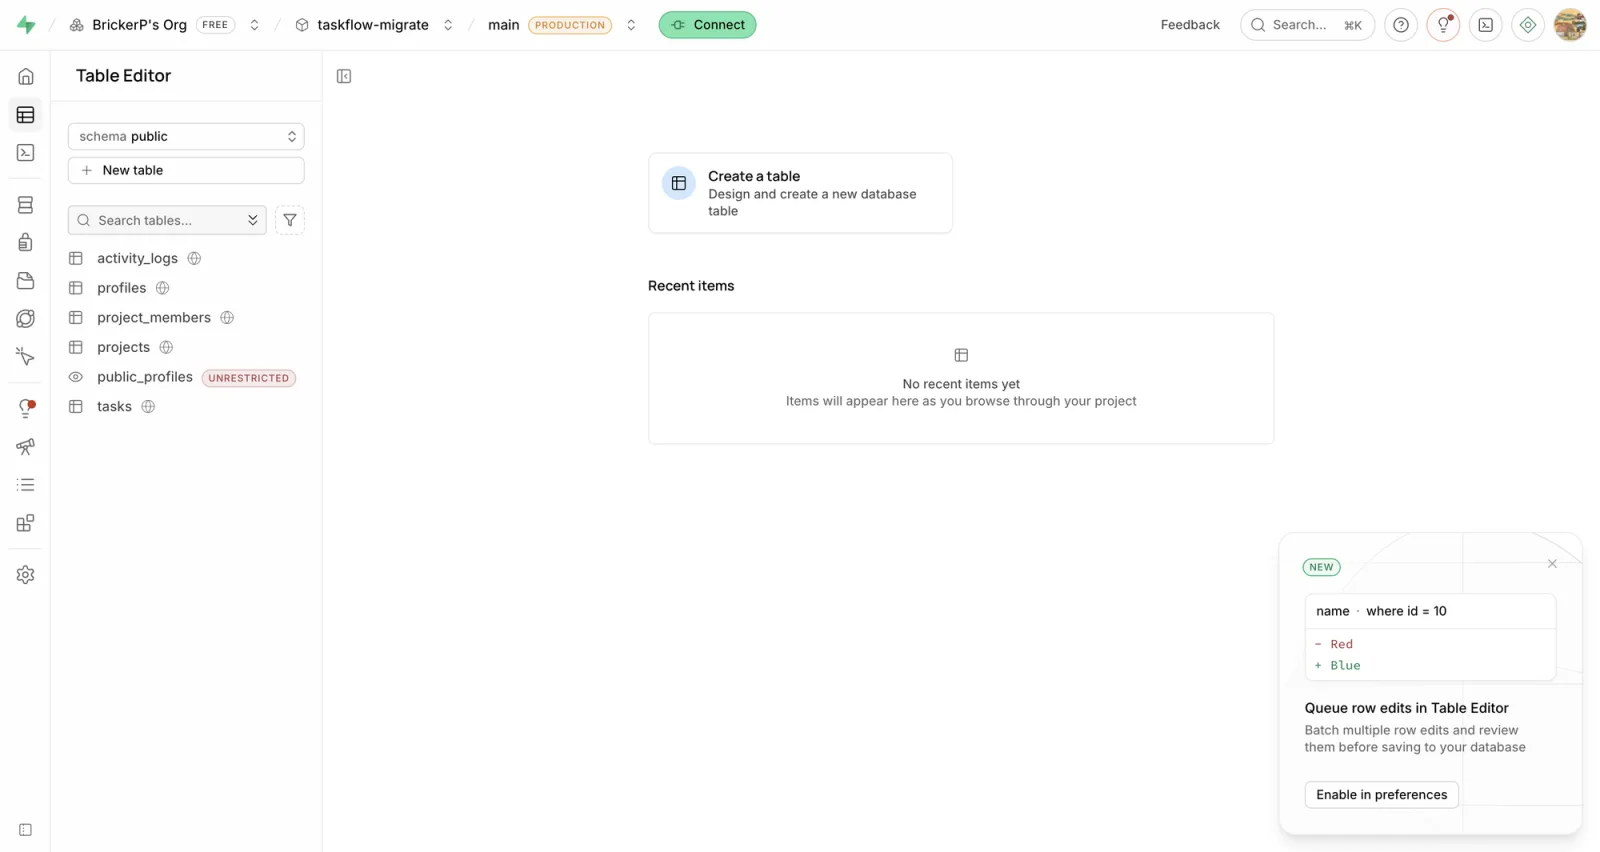
Verify the Import
You can also see the migrated tables directly in the Supabase Table Editor.
7. Deploy Edge Functions and Configure Secrets
First check whether the package has functions:
If there are no functions (many apps are pure anon plus RLS, with no server-side functions), skip this section.
If there are functions, deploy them and reconfigure their secrets:
Note: Function secrets are not in the source package and must be reconfigured manually: third-party API keys, and any
SUPABASE_SERVICE_ROLE_KEYreferenced inside functions.
8. Migrate Data (Optional)
This step requires the connection string of the source database (MeDo's hosted Supabase). Regular users usually do not have direct source access, in which case data cannot be migrated automatically — you can only re-run the app to generate data, or ask the platform to help export it. A newly created app has no data, so you can skip this.
If you can reach the source database:
Verify that select count(*) on core tables matches between source and target.
9. Replace .env and Run Locally
Edit .env in the project root, swapping the URL and anon key for your own project's values (collected in section 5). The variable prefix depends on the framework, so check the existing names in your .env:
After editing, .env looks roughly like this:
Install dependencies and start the dev server:
Note: Do not use
npm run dev. MeDo replaces thedevandbuildscripts inpackage.jsonwith a placeholderecho, so they do nothing. Usenpx viteinstead.
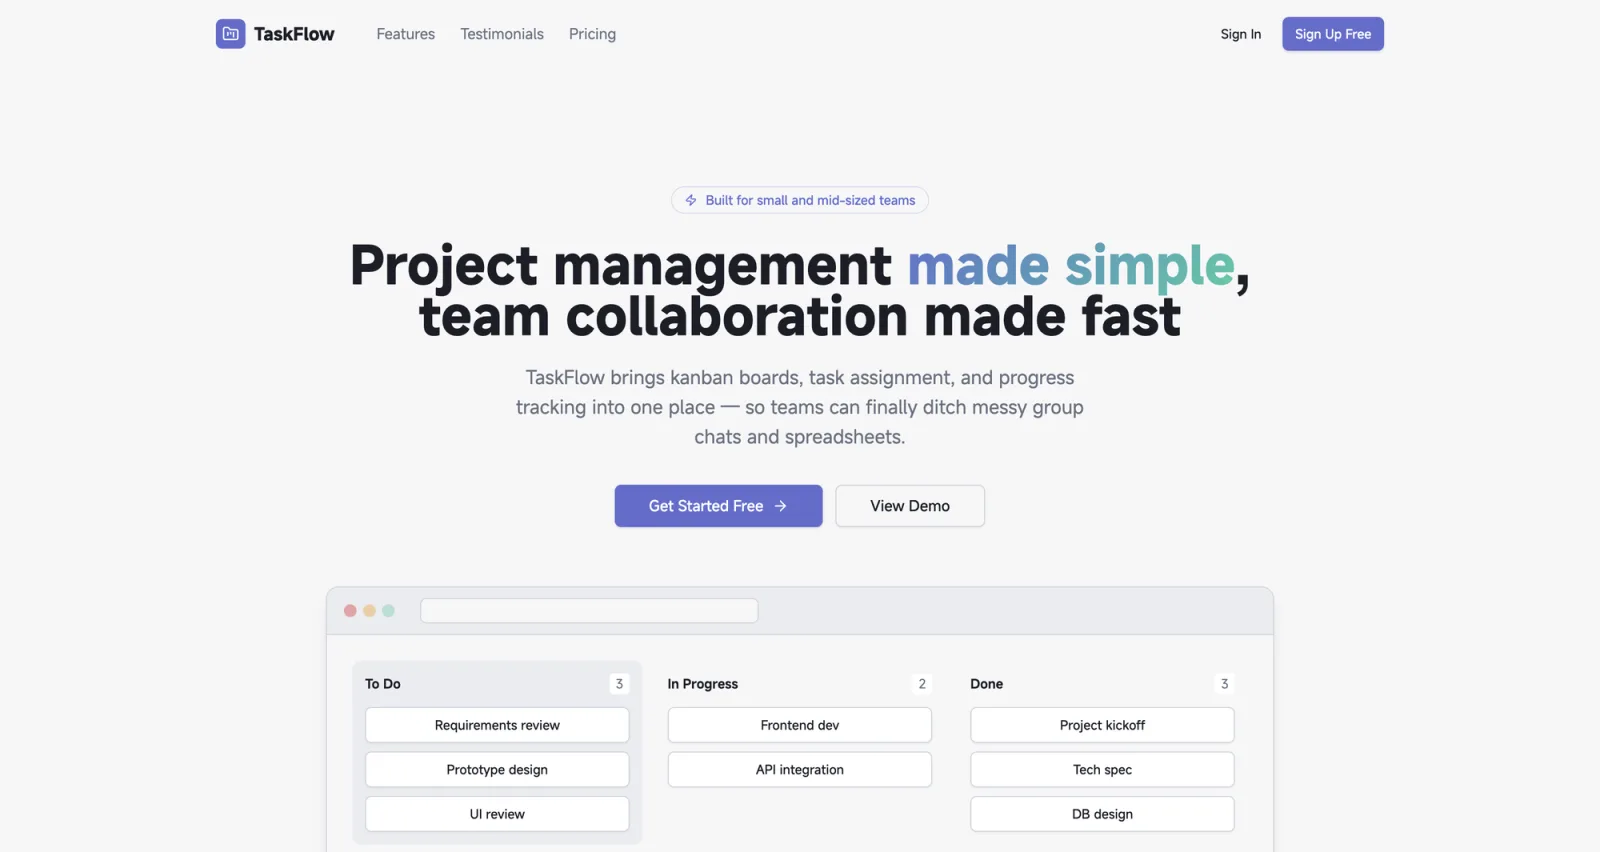
Open the address shown in the terminal (for example http://127.0.0.1:5173/); the landing page should render.
Disable Email Confirmation
A new Supabase project has email confirmation enabled by default, so after signup you would need a confirmation email before you can log in. For local testing, turn it off first: in the console go to Authentication → Sign In / Providers → Email, toggle off Confirm email, and save.
Note: Disabling confirmation (and the admin-API shortcut below) is for local testing only. Before going to production, turn Confirm email back on so real users verify their address.
The Free plan also has an email send rate limit. If you still hit email rate limit exceeded after disabling confirmation, use the service key to create a pre-confirmed user via the admin API:
Verify That Data Lands in Your Database
In the app, sign up or log in and create a record, then query the database:
After login you reach the workspace, with data coming from your own Supabase.
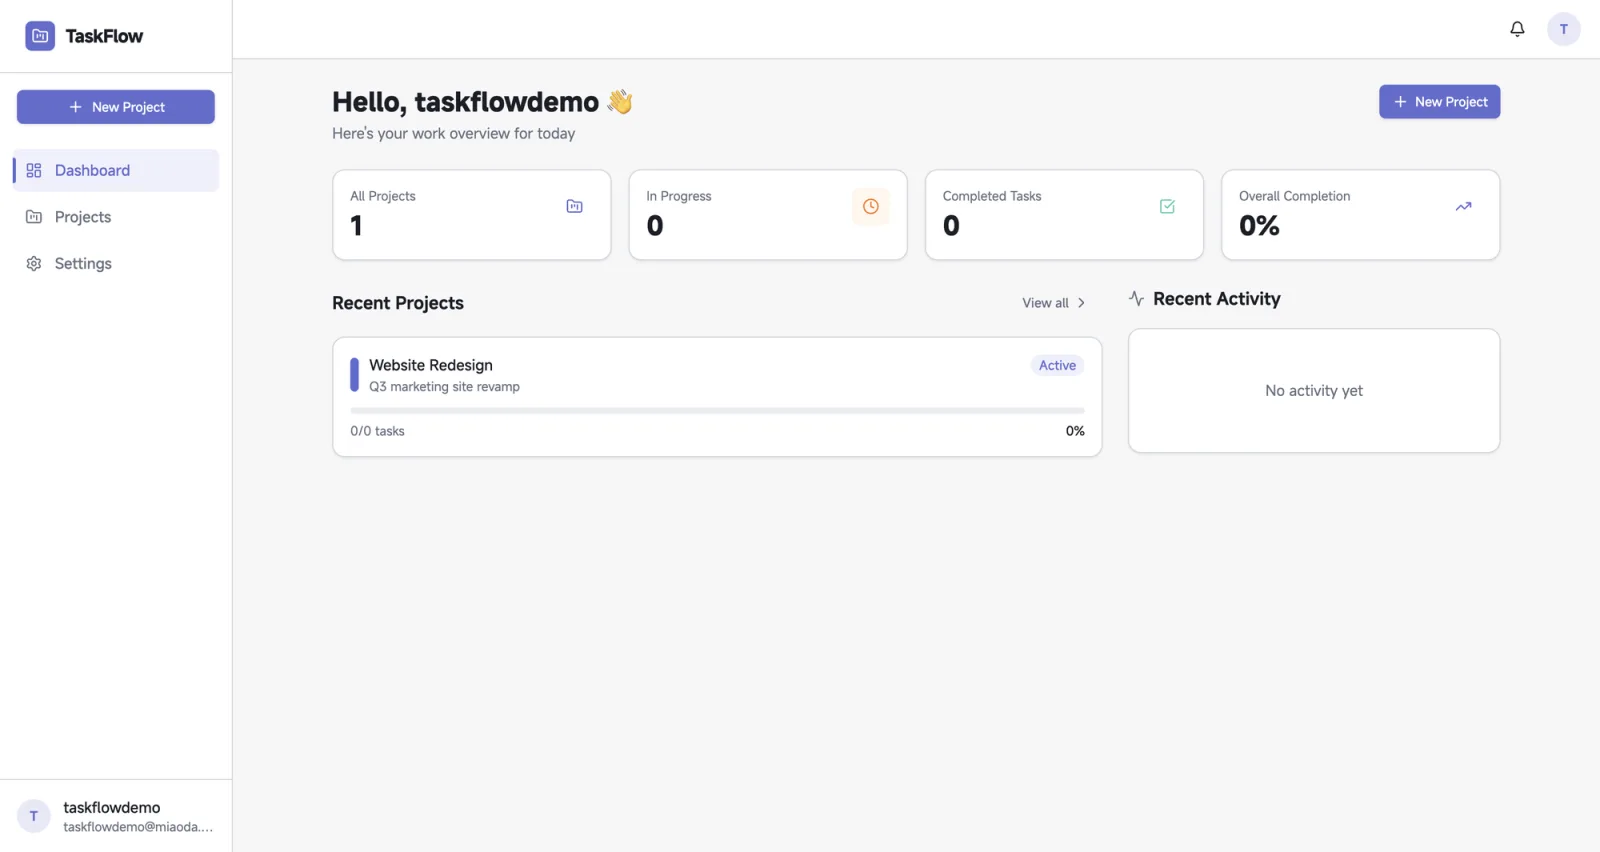
All three tables return the corresponding records, proving the whole chain — signup, trigger-created profile, business write — hits your own Supabase.
10. Common Pitfalls
11. Migration Checklist
- Tools ready:
supabase,psql,node20 or later - Download and unzip the source, confirm
supabase/schema.sqlexists - Create your own Supabase project, save the database password
- Collect four credentials: URL, anon key, database connection string, service key
- Run
psql -f supabase/schema.sql, verify tables, RLS, and triggers - If functions exist, deploy them and configure secrets (otherwise skip)
- If data is needed, migrate it (only if you can reach the source database, otherwise skip)
- Replace the URL and anon key in
.env - Disable Confirm email
- Run
pnpm installandnpx vite, then sign up, log in, and create data - Query the database to confirm data hits your own Supabase