
Creating a site
Learn how to create a site with a one-sentence prompt, voice input, a file, or an image.
There are four ways to start a site, and they all end in the same place — a requirements document you review before MeDo builds. Pick whichever matches what you already have: a sentence, your voice, a document, or a screenshot.
Start on the Home page. Pick what you want to make from the row of buttons under the prompt box — Website, Mobile, and so on — then use the controls inside the box. Open + for the build mode (Deep Build or Fast Build), Add from asset library, and Upload. The Skill button calls a Skill as part of the request, and Shared Backend lets the new app reuse an existing project's data (see Sharing a backend). The microphone is on the right of the box.
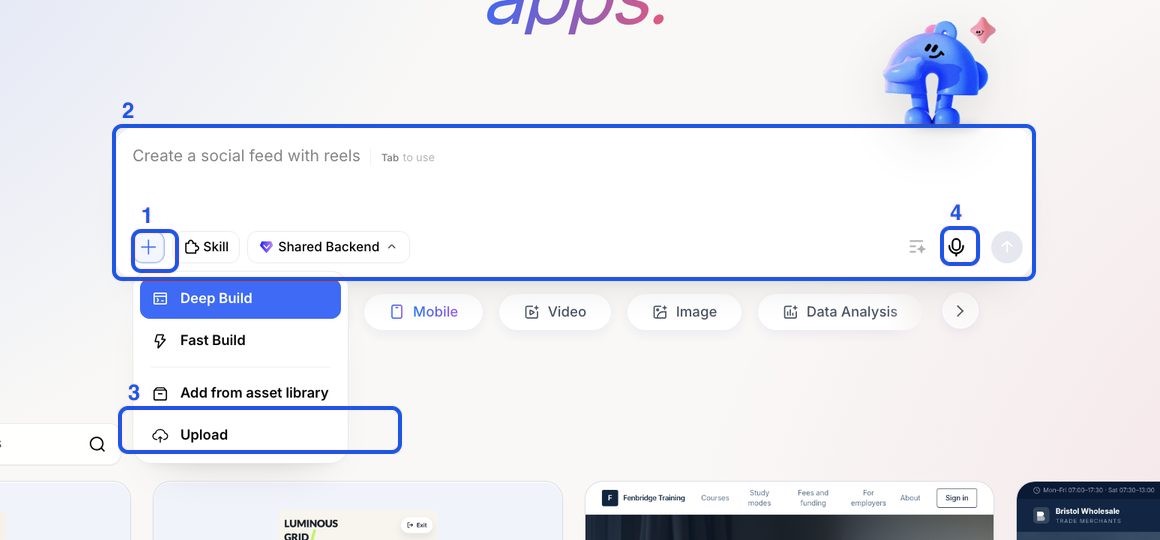
- + — build tools, including upload.
- The prompt box — type what you want.
- Upload — attach a file or image from your computer.
- The microphone — speak the prompt (Chrome).
From a one-sentence prompt
- Type what you want in the prompt box. For example: “Create an outdoor activity sharing website.”
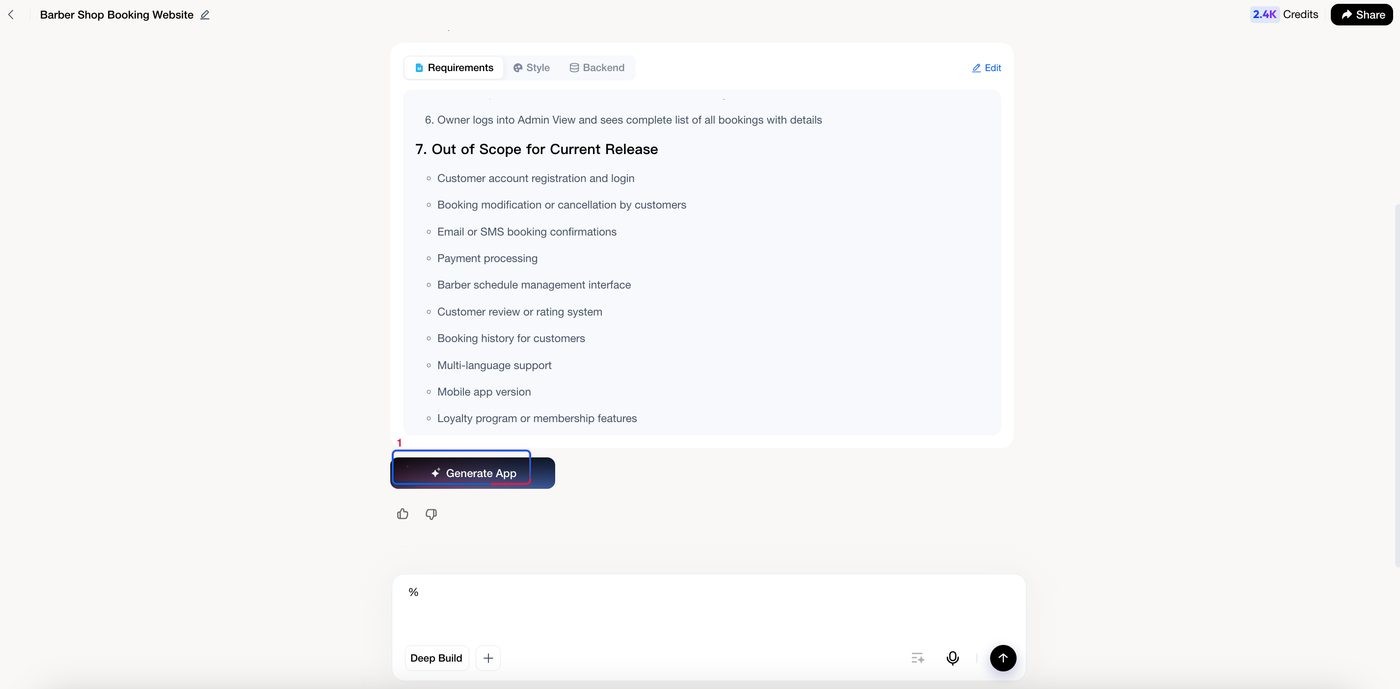
- Send the message. MeDo writes a requirements document with Requirements, Style, and Backend tabs. Read it, and click Edit to change anything that is wrong before building.
- Click Generate App. A small site takes a few minutes; you can leave the page while it builds. The build is charged as one message in the mode you chose (10 credits in Fast Build, 40 in Deep Build), on top of the message that produced the document.
From voice input
- Click the microphone on the right of the prompt box and describe what you want out loud. Voice input needs Chrome.
- Review the transcript in the box, then send it.
- Review the requirements document and click Generate App.
From a requirements file
- Click +, then Upload, and attach a requirements document. You can attach up to 5 files, 20 MB each, in formats such as
txt,doc,docx, andpdf. To reuse a file you uploaded before, choose Add from asset library instead. See Using the Asset library. - Say what kind of app you want in the prompt box, then send.
- Review the requirements document and click Generate App.
From an image
Match a design you like
- Click +, then Upload, and attach a screenshot of a design you want to follow.
- In the prompt box, say what should be clickable. For example:
- Review the requirements document and click Generate App.
Use your own image inside the app
- Click +, then Upload, and attach your photo or artwork.
- Say where it should go. For example: “Use this image as the homepage banner.”
- Review the requirements document and click Generate App.
Start from a suggested prompt
The Home page shows sample prompts under the box and a showcase of community apps below. Clicking a suggested prompt starts a build straight away and costs 30 credits, so read it first and make sure it is close to what you want. If it is not, type your own prompt instead.
Next steps
- Sharpen the prompt before you build: Writing better prompts
- Reuse your own logo and photos: Using the Asset library
- Refine what you got: Editing your app
- Publish it: Publishing a release